How to Achieve a Precise 3D Scan
A precise 3D scan simply means consistency of the measurements. However, a high level of precision doesn’t guarantee accuracy. An instrument that is well calibrated can read a precise reading, yet it might read it inaccurately, highlighting the need for accuracy as it effectively means true precision.
For decision-making, it’s important to have precise 3D scans. For this, you need to define parameters leading to valid measurements. Certain criteria and techniques must be followed to achieve a precise 3D scan. Here is a quick breakdown of them:
Select the Right 3D Scanner
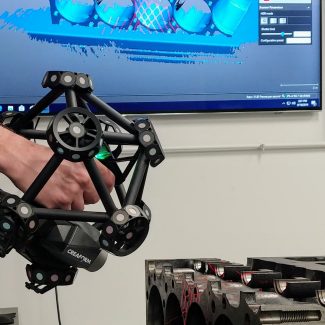
Select a type of 3D scanner that is most appropriate for your work. Various scanners are categorized as laser, photogrammetry, and structured light scanners. Whichever scanner you use, make sure that it is calibrated properly. Precise measurements are dependent on correct calibration. Besides calibration, it’s critical to position the scanner at appropriate distance and angle relative to the object. Use the recommended scanning distances based on what your particular scanner requires.
Prepare the Object
Ensure the object to be scanned is cleaned so there are no waste spots, such as dirt, dust, and residue on its surface, which will affect it during the scan. On the other hand, try to use a matte spray or powder on reflective and semi-transparent surfaces for greater scanning precision.
Set Up the Environment
Make the scanning environment bright. Even identically lit conditions allow the scanner to record with more precision. Ensure less interference from ambient light, as these can potentially affect scanner operation. The ideal situation occurs when the scan is performed in a place that does not have ground vibrations. While collecting this information by the scanner, some external movements from the object and device may cause noisy images to be incorrectly measured.
So, make sure your place is appropriately lit with nearly zero ground vibrations to achieve the desired outcomes.
Scan in Small Sections
If the object cannot be broken down, scan it in sections one at a time. This enables increased details and accuracy. Use marker targets to help you with this alignment. Such targets are common features that can be identified through many scans. Furthermore, it provides for adequate overlap between consecutive scans. From the post-processing point of view, overlapping contributes to better alignment of scans within the software.
Post-Processing
Conduct further scans or modify the process of making these readings to improve upon what has been achieved during this phase. Apply software for post-processing to join and overlay the individual scans. Different post-drawing software packages are usually utilized to refine the final three-dimensional model.
Assess the scanner periodically and change its settings when necessary. Tweak variables involving resolution, exposure, and sensitivity. Record the scanning parameters, calibration conditions, and any information concerning the specifics of a process. This documentation can serve as a future reference or in cases where changes are needed.
With these tips, you can run the 3D scanning processes confidently and quickly and achieve consistent, reliable outcomes.

